Ultimate Guide to Register Business on Carata Version 4
Purpose
This guide explains how to register a new business on the Carata Business App. Registering a business allows you to create your business profile, set up customer support information, configure commission preferences, enable optional AI features, and make your business available on the Carata platform.
Prerequisites
Before you can register a business, you must have a carata account https://business.carata.co/login.
If you already have an account
1. Open the Carata Business App(Carata Seller).
2. Log in using your registered credentials.
3. Complete the OTP (One-Time Password) verification if prompted.
If you do not have an account
- Open the Carata Business App.
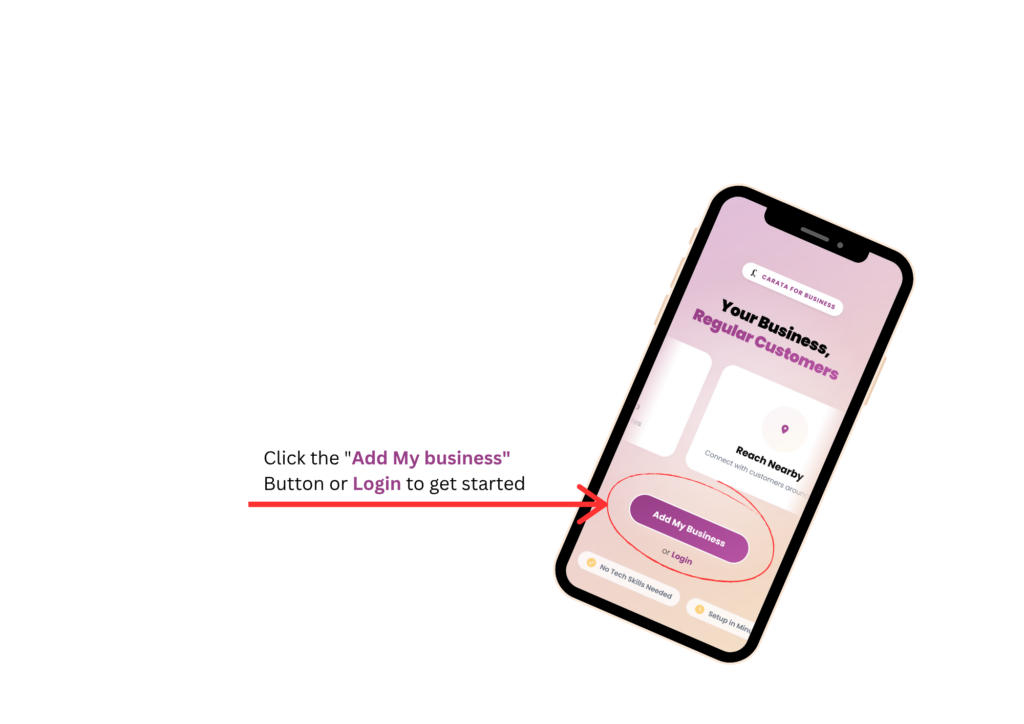
- On the welcome screen, Add My Business or Login.
- You will be taken to the registration page to either sign in with google or sign in with email and password..
- Click sign in with google to be automatically signed-in using your google information if you are sure of your google information.
- If you are not sure, click create an account https://business.carata.co/users/sign-up#t, right under the login button.
- Enter the following information:
- First and Last Names
- Email address
- Phone number
- Password
5. Submit the registration form and login.
After submitting the form, you will be redirected to the login page. Login with your email and password. Carata will send a One-Time Password (OTP) to verify your identity. Enter the OTP to complete account verification
About OTP Verification
Furthermore, Carata uses OTP verification because the Business App manages sensitive business and revenue information.
Important notes:
- Every login requires identity verification using an OTP.
- The OTP is valid for approximately 2 minutes as shown in the message.
- Once successfully verified, your login session remains active for up to 24 hours.
- After the 24-hour session expires, you must verify your identity again using a new OTP before accessing your account.
This security measure helps protect business data and prevents unauthorized access.
Registering a New Business
After successfully logging in, you can register your first business or add another business to your account.
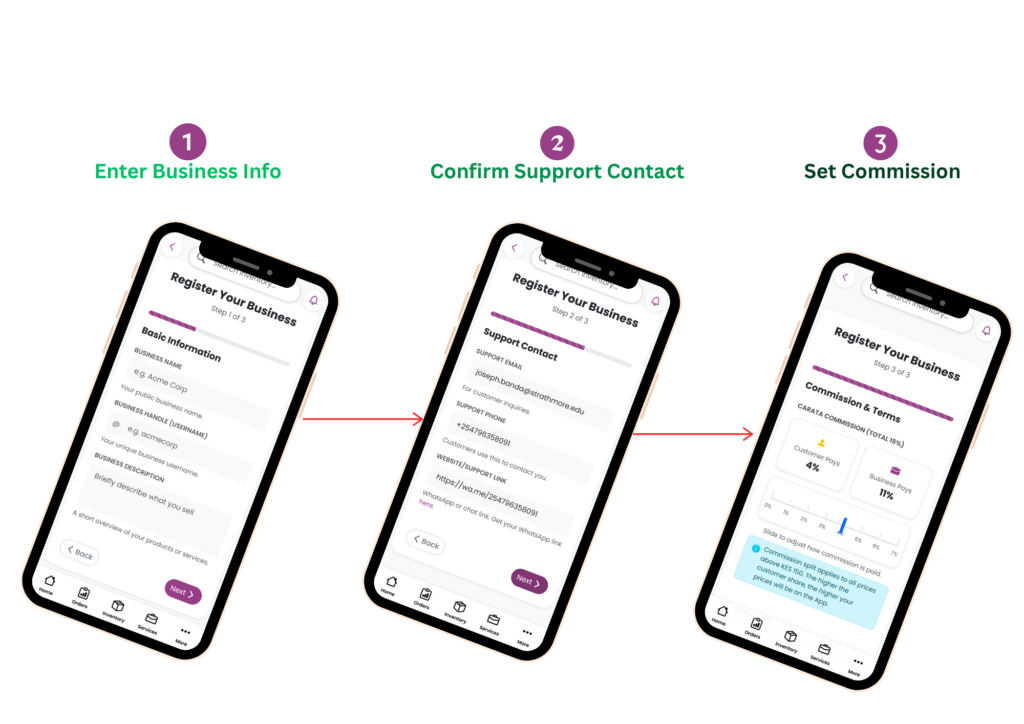
Step 1: Open the Business Registration Page
- Go to the Home page.
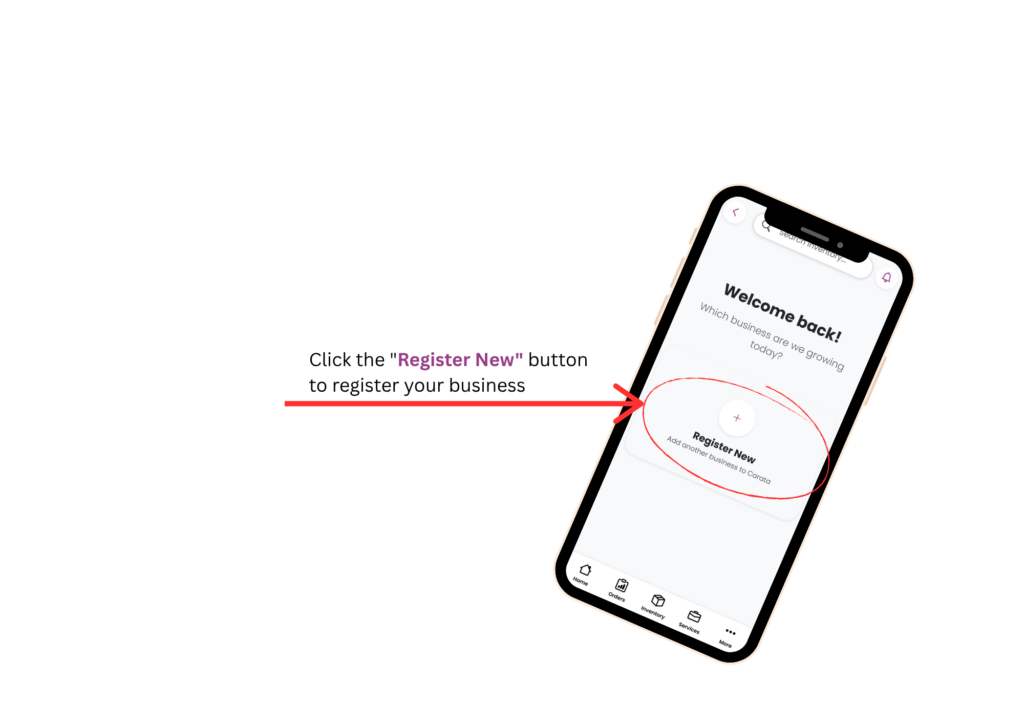
- Locate the button labeled Register New.
- Under the button, you will see the description:
Add another business on Carata
Tap Register New.
A business registration window will open.
Step 2: Enter Basic Business Information
The first registration screen requests your business details.
Fill in the following information:
Business Name
Enter the official name of your business as you want customers to see it.
Example:
- Joe’s Kitchen
Business Handle
Enter a unique business handle.
The business handle acts as your business identifier inside Carata.
Choose a handle that is:
- Easy to remember
- Unique
- Related to your business name
Business Description
Enter a short but unique description of your business.
A good description helps customers understand:
- What you sell
- Your specialty
- What makes your business different
Example:
Fresh homemade meals delivered daily across Nairobi.After completing all required fields, tap Next.
Step 3: Add Support Contact Information
This section tells customers how they can contact your business.
Complete the following fields.
Email Address
Enter the business support email customers should use for inquiries.
Example:
support@yourbusiness.com
Phone Number
Enter the business phone number customers can call.
WhatsApp Support Link
Carata supports direct WhatsApp communication between businesses and customers.
The field contains the following format:
Simply add your WhatsApp phone number to the end of the URL if it’s not already there.
Example:
Do not include:
- Spaces
- Brackets
- Dashes
- plus(+) sign
Only use the country code followed by the phone number.
Don’t Have a WhatsApp Link?
The page also includes a helper link labeled:
Get your WhatsApp link here
Selecting this link opens a helper page where you can:
- Learn how WhatsApp links work.
- Generate your WhatsApp chat link.
- Open WhatsApp directly if needed.
Once your contact information is complete, tap Next.
Step 4: Configure Commission Settings
This section determines how Carata’s commission is shared between your business and your customers.
Total Commission
Carata applies a total commission of 15% per transaction.
This commission can be shared between:
- The business
- The customer
The total combined commission always remains 15%.
How Commission Sharing Works
During registration, you choose how much of the 15% commission the customer will pay.
The remaining percentage is automatically paid by the business.
Examples:
| Customer Pays | Business Pays |
| 0% | 15% |
| 2% | 13% |
| 5% | 10% |
| 7% | 8% |
Products Below KES 151
Products priced below KES 151 follow a different pricing rule. For these products, the commission will be wholly paid by the customer through price markup.
Below are the markup rules for different price ranges:
Product’s price(KES) Price Markup
1 – 50 = 5%
50 – 100 = 10%
100 – 150 = 12%
Products KES 151 and Above
Products priced at KES 151 or higher use the commission split selected during registration.
Example:
Product Price: KES 170
Commission: 2%
The customer will see a 2% markup added to the displayed price. The remaining 13% commission is paid by the business. If the customer commission is set to 0%, customers will see the same price that exists in your physical shop or business. The business then pays the full 15% commission. Choose the commission arrangement that best matches your pricing strategy before continuing. But remember, the higher the commission you place on the customer, the higher your price becomes on the app.
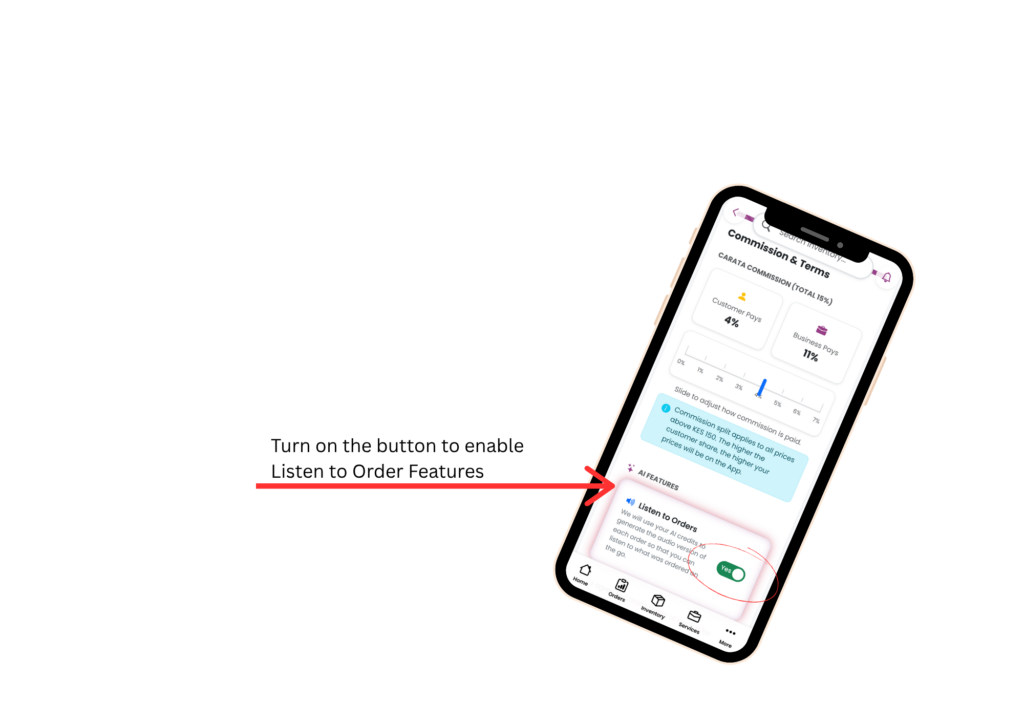
Step 5: AI Order Reading Feature
Carata includes an optional AI-powered feature that can read customer orders aloud.
This feature is useful for businesses that:
- Are busy serving customers.
- Cannot constantly look at their screen.
- Want hands-free order notifications.
When enabled, Carata’s AI can read incoming order details so you can listen instead of reading them manually.
You can choose to:
- Enable AI Order Reading
- Disable AI Order Reading
Important!!
Using AI-powered features consumes AI Credits.
AI Credits are explained in a separate knowledge base article dedicated to AI features and billing.
You can change this setting later if needed.
Step 6: Accept the Terms and Conditions
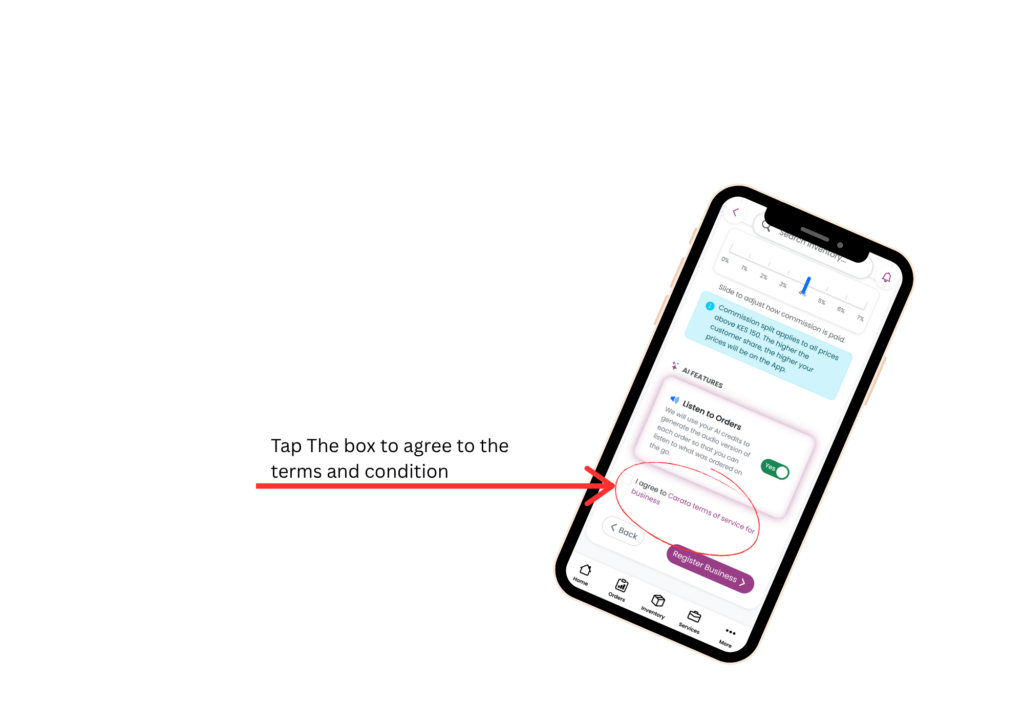
Before your business can be registered, you must agree to Carata’s Terms and Conditions.
Read and accept the agreement by selecting the checkbox provided.
If you would like to review the complete agreement before accepting it, select the link:
Carata Terms and Service Conditions
This opens the full Terms and Conditions document for review.
Step 7: Complete Registration
After reviewing all the information:
1. Confirm your details are correct.
2. Accept the Terms and Conditions.
3. Submit the registration.
NB: After the registration is completed, the admin will have to review your information and approve your business to complete the registration process and add your business to the app. You can always edit your business profile after completing the business registration process. To edit click Business Info then take manage business. Read separate article on editing business profile.
Once registration is successful:
1. Your business profile is created.
2. Your business is added to your Carata account.
You can proceed to create branches, add products, and configure additional business settings.
Expected Result
After successfully completing the registration process:
1. Your business is registered on Carata.
2. Your business appears in your list of managed businesses.
3. You can begin setting up branches, products, staff, and other operational settings.
4. Customers will be able to discover and interact with your business once it is fully configured and published.
Related Articles
After registering your business, the next recommended guides are:
1. Adding Business Branches https://carata.co/blog/2026/08/14/how-to-add-business-branches-on-carata-4/
2. Adding Products
3. Managing Business Analytics
4. Understanding AI Credits
5. Managing Orders with Carata AI